Showing posts with label Crafts. Show all posts

Wednesday, February 13, 2019

How to Make: ICE MARBLES!


 Ice Marbles

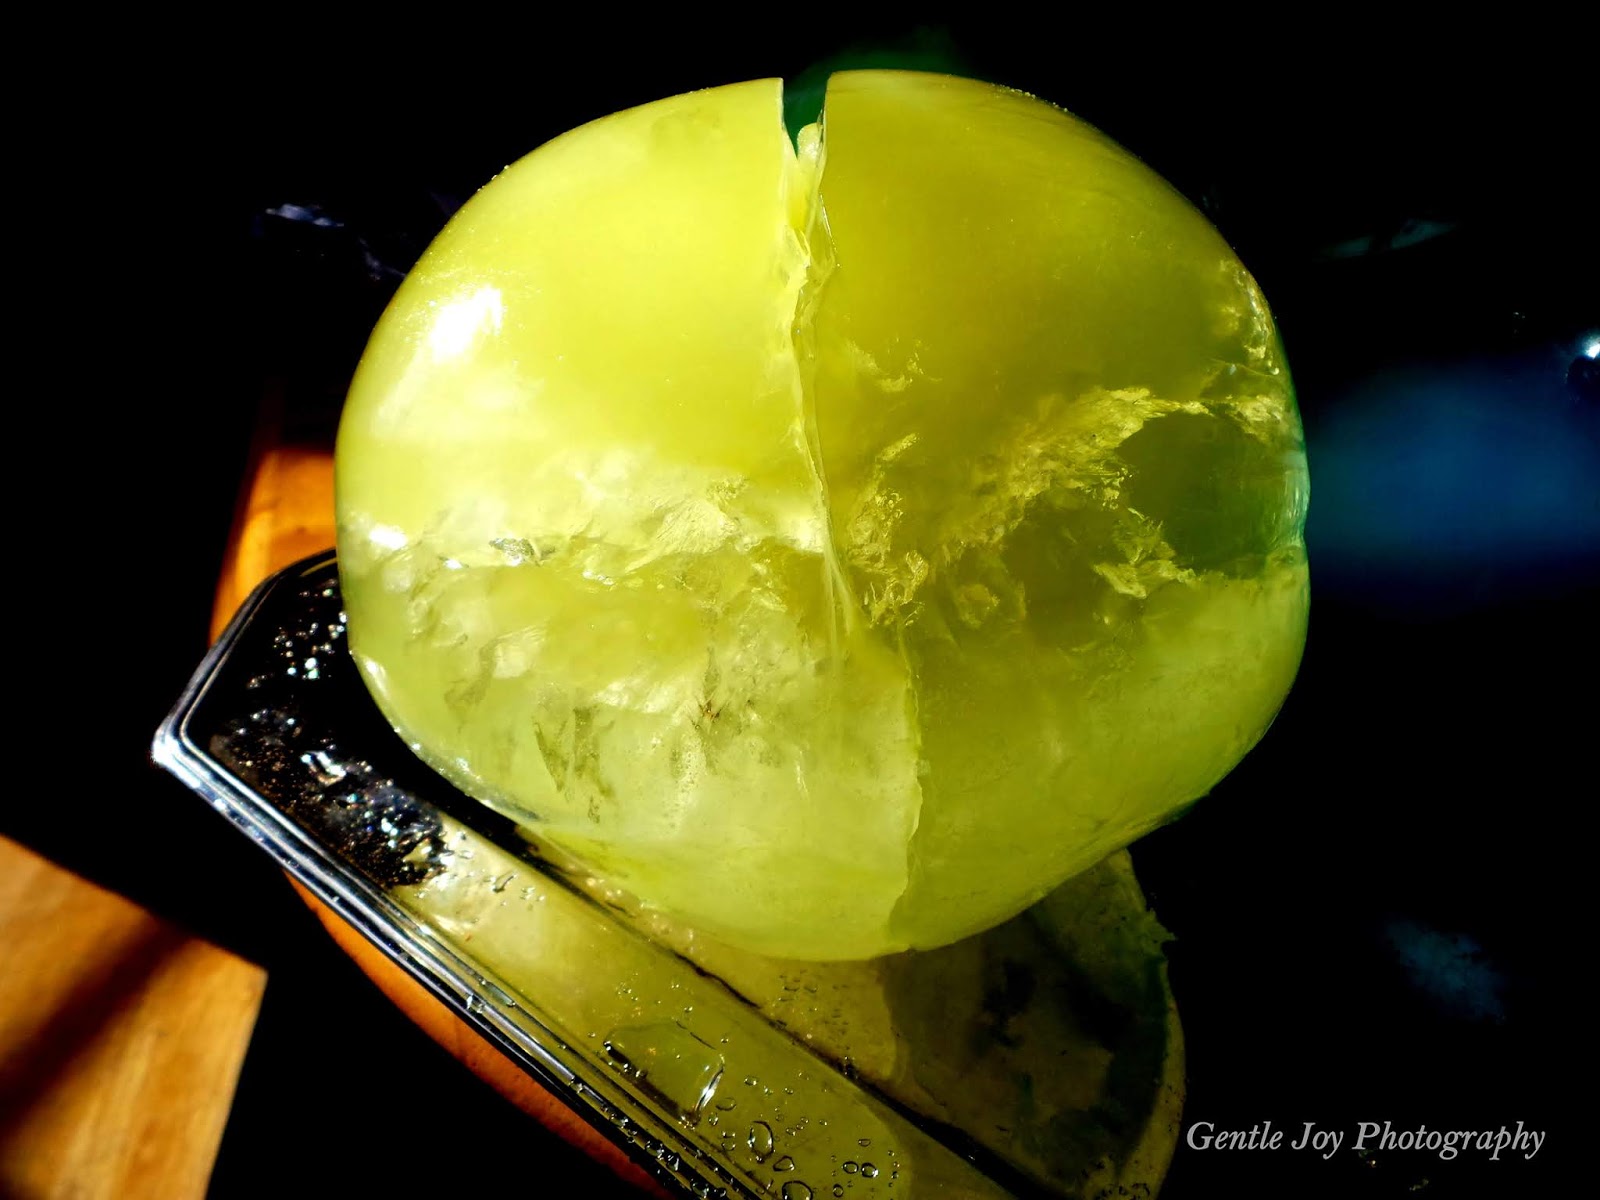
 Fun and easy....  Just put water in balloons and freeze them. You can add food coloring if you like. In these, I put some liquid food coloring in the opening of the balloon, then attached the end to the kitchen sink faucet and filled it, tying off after.

The balloons I used were old ones and they kept breaking, but worked anyway. Since they were so old, the balloons made flatter marbles than the ones we made in another post called: 
Frozen Water Balloons!           

We put them in stainless steel bowls and trays because the balloons were very hard to carry and we didn't want them to break. We put ours outside in the cold as it was bitterly cold. These could also be made in the summer, using the freezer, for a summer activity.


 Some balloons had and an air pocket and some showed the neck of the balloon.

Some had cracks which made them look even more like marbles.


After peeling the balloons off of the ice marbles, we took them back out to the cold to keep them from melting.


 This one cracked a lot, but stayed together and we liked the patterns.


This orange ice marble was not totally frozen inside. Though they were out for 24 hours in very deep cold, I had 3 big balloons nestled together in a large bowl and I had used warm water to get a clearer ice marble, so that is probably why it wasn't totally frozen.

This looks like an ice cave and we enjoyed seeing the crystals and patterns after the water left.


These are a good project.... fun and easy. Kids and adults both enjoy seeing them. We have put these along a walkway in the winter and they last quite a while if the weather stays cold.

Enjoy the precious times with making memories with your family... they are so important.

Thank you for visiting.


Tuesday, December 22, 2015

Hot Cocoa Cup Cookies


Every year our family takes some fun food to our "Christmas Crunch" time at church or other times during the year.   You can see some of our other fun foods here.  
Fun Foods We Have Made

This year, I had seen cute little cups made of marshmallows on pinterest, so we experimented and made some.  They were very popular-especially with the little ones. :)


The first step is to make or buy some cookies that will work as a "saucer" for the cups.  I wanted them to be about 3" in diameter and thankfully, I had a cookie cutter that size.

I used the next smaller size cookie cutter to press a design into the edge, although I ended up covering it up with frosting. 


 I wanted to have a scalloped edge of some kind... and this worked.  Plain circles would work fine... or buy some cookies at the store of a similar size. 


Next, spread some chocolate on the top, as shown in the picture. It could be chocolate frosting.... or I used some homemade fudge that didn't set up quite right.  :)


I didn't know what to do about the little marshmallows on the top... I was figuring this out as I went....  I ended up just tearing off little pieces from a big marshmallow and it worked fine. I put 3 little marshmallows into each "cup". 

Next, I used a sharp knife to dig 2 little holes in the side of a regular sized big marshmallow-not a big hole, but enough to allow the broken candy cane handle to go into the marshmallow.


 I had to shop around to find little candy canes... a couple of places had some that were too big, or the arch was too much for these marshmallows...  Finally, we found some that would work.

Just break off the end, so there is a U-shaped piece. Push into the side of the marshmallow. Yes, it can make it a bit oddly-shaped. and the bottom wasn't flat, but it worked.

See how we used the leftover pieces of broken candy cane here....
Easy Edible Doors!


I got tired of doing these one at a time, so started a bit of an assembly line method...


 I put a layer of white frosting on each cookie-saucer, then decorated it and put some matching decoration on the cup.  I did have some decorations - the stars were from some after 4th of July sales, but I did also buy a package of 4 different candy decorations. If you have time and desire to do it, you could use only frosting also, but I was in a hurry.


 I put extra frosting on the bottom of the "cup" before I put it on the saucer... and we learned to use that frosting to make the cup as level as possible.  The bottoms of the "cups" weren't flat due to the candy cane handles.


We had so many comments on these... and the younger kids LOVED them and even used them as play food before they ate them. 


 Are these simple and easy and fast? Well.... no... but they aren't hard either... just a bit time-consuming.  We got a lot faster as we went and as we figured out how to do them.  We made 29 of them, so that took a while, but we were very glad we made them.


   These are great for Christmas or New Year's, but they would also be wonderful for a sledding party or Valentine's Day or a summer garden party.... or a little girl's tea party.  :)   There are so many possibilities with these.

We served them on stands, but they would also be great served in other ways. They can be made all the same... or varied as we did.

By they way, you don't have to be too fussy with these... as my son reminded me, "It won't take long for the kids to eat them.":)

Thank you for visiting my blog today... and I hope you and your family remember to give thanks to God for the wonderful gift of His Son, Jesus, during this season. What a blessing that Jesus came, and lived, died and rose again...defeating death and sin... so that we could have eternal life. That is the best gift ever.


Shared on:


Foodie Friday and Everything Else
Bernideen's Tea Time
Share Your Cup Thursday

Monday, April 27, 2015

Make Your Own House Numbers


 A few years ago, I wanted to replace our worn out house numbers and make it easier for people find our house. I saw an idea that I liked.

These just use old ceramic  tiles...  like from a kitchen or bathroom... you can also buy new ones... they aren't too expensive and you only need one for each number in your address.

The ones I used are 4 1/4" x 4 1/4". They are already sealed by the factory because they are meant to use in places that get wet or need a lot of cleaning, so they are sturdy.

I liked it that this project is very inexpensive and yet it turns out to be so appealing and inviting.


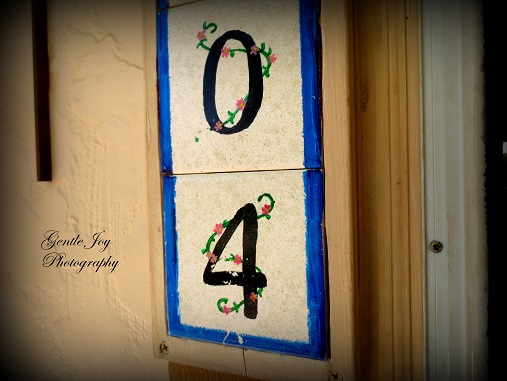
I used acryllic paints.... just paint a large number on each tile and add any decoration you want that will enhance without making them difficult to see.

I also added the blue stripe around the edges... I wanted it to show up from the road and also look nice. 

After painting on them, I sprayed them with a clear lacquer meant for outside. I gave it a couple of coats. Then we made a wood frame for it, glued the tiles it and hung it outside the front door.

It has worked very well and we have been so glad to have them. You can see up close here... it isn't perfect, but they look nice

I made mine to hang vertically, but they could also be made to stay horizontal.

This idea would also work to make a sign... maybe the family name... or a statement.. sports team ...  or cottage business name.. 

These have been up for several years... I can't remember how many and am guessing maybe 5 or 6... and we have not done anything else to them. They have held up very well, although the lower ones (near the doorbell and more exposed to the sun/weather) need a little touch up, as you can see.

It is a great project... not hard, but well worth doing.

Thank you for visiting my blog today. I hope you have a wonderful week. :)


Shared on:'


Snickerdoodle Create Bake Make
Scraptastic Saturday
Simple Saturdays
Family Friday Link Party
Paula's No Rules Weekend Party
Home and Garden Thursday
The Homemaking Party
Wise Woman Link Up
Penny Pinching Party
Wow Us Wednesday
Tuesdays w/ a Twist
Tuesday Talk
Project Inspire(d)
Inspire Me Tuesday
Modest Mom Monday
Art of Homemaking Monday

Featured on:


Scraptastic Saturday       

Sunday, January 11, 2015

Homemade Family Heirloom

Recently, we came across an item that is special to our family. It is a baby quilt I made for our oldest son before he was born. It has been well loved and is not in great shape anymore... it needs more delicate handling than it did when I first made it.


  I had already lost one child through miscarriage, so when problems started with my second pregnancy, the doctor put me on bedrest, for a time. I was still grieving the loss of my first baby and was determined to protect this precious one as much as possible, so I obeyed the doctor.


I have never been a person to sit (or lay) around and do nothing though, so it didn't take long for the enforced rest to get really old. I found a pattern in a book and decided to make a baby quilt.....
  This project required:

embroidery
applique
cutting and sewing pieces
lots of hand sewing
machine sewing
hand quilting
etc.

I used fabric I already had since money was tight and I couldn't get to a store with being on bed rest.


I had never done any applique before, so that was a new thing for me.  I did that and the embroidery by hand and could do it laying in bed, although sometimes I was allowed to sit up for short periods of time also.

It sure felt good to be doing something... and to be making something beautiful for my baby.... anticipating his/her arrival rather than fearing what could happen.


I loved the ribbon idea... with the two fabrics showing the front and backsides of the ribbon.


Some of the damage is apparent here... the embroidery floss is tattered and worn away.


 The colors are very faded from what the original was.....  the backside was originally a soft (baby) yellow.


My oldest slept with this quilt for many years.... I made it with colors that would be appropriate for a boy or a girl since at the time I didn't know which we would have. 

I learned as I went on this quilt... my exposure to embroidery wasn't very large, so I did the best I knew how to... and my husband and I enjoyed how it turned out.


Here you can see where the fabric is rotting in a few areas.  The quilt still feels soft and usable... but it sure isn't something to use carelessly.


I had made a set for the bassinet - there was a small quilt with it. I also made a matching set for the crib and there was a quilt with that also... so our son didn't use this quilt for the first year or so.... and I was keeping it "nice".  

  One day I realized that keeping it "nice" meant that my son wasn't using it at all and would have no attachment to it... it would be special to me, but not to him.... so we started using it with him and it became very special. We travelled a lot by the time he was 3 years old for surgeries for our second son, so it was very nice to have a familiar special quilt for him to keep with him. He used it in hotels, hospitals, Ronald McDonald House, home, doctor's offices....and more.


Now, it is showing some age... after all that son is now an adult.... and I realize how very precious the "damage" is.... This is not just a beautiful quilt in pristine condition that was untouchable... this was well-loved. It reminds me of the Velveteen Rabbit story ... where love made the special things "real". Well, this became extra special... and when we came across this in the attic, it brought back so many sweet memories. :)
How glad I am that he was allowed to love it.... that I didn't just "save" it. Now, we are saving it for him to show his family someday.... and I am really enjoying having it for right now.  It was a huge amount of work... it took many hours to complete and my inclination was to protect it all those years ago.... but the loving it received only made it more special.... and precious. Now, it is an heirloom worth passing down in the family

I'm glad you joined me today... and I hope you have a wonderful week. :) 


Shared on:

 Vintage Charm Party