Showing posts with label Herbs. Show all posts

Sunday, August 20, 2017

How to Make CHICKEN BITS!


  I started making chicken bits and they are wonderful! I am using them the same way we would normally use bacon bits. The flavor is strong and tasty and I know what is in them since I am the one making them. Also, I have tired of the fatty bacon bits and am loving the better chicken bits. They are not hard to make either.


  First of all, I cook chicken breast... you can use other parts of the chicken, but I have used the chicken breast. I watch for it to be on sale and I love to cook it in the crockpot and let it be marinated to deepen the flavor and make it wonderfully moist.  Here's how I do that:

Strange Marinades for Chicken!

 Most of the chicken breast was shredded, as shown here, but I saved out some larger pieces to use for making chicken bits....  see next picture. I could have used the shredded chicken also, and may in the future.


  I put cooked chicken in a frying pan with olive oil and seasoning. You can use your favorites... or experiment.  :)

I used a variety of spices... including Italian seasoning, dried garlic and onion and more. I didn't measure... just sprinkled it on the cooked meat in the pan.... and added more when I wanted to.

Next step is to start cutting the meat  with the turner. Since the meat is cooked and so tender, it is easy to cut.


Cutting with the edge of the turner worked well and I kept cutting the pieces smaller and smaller.


I added some BBQ sauce and some Italian dressing to it as it was cooking... and some more olive oil. 


This was cooked on a medium heat and turned often to brown and toast the meat.


 You can decide how brown you want your chicken bits. I cooked mine for about 25 minutes or so and turned them often so they wouldn't burn.

I would have been fine with cooking them to a darker crispness and yet, we loved them this way too. I think there will be some variation on how well done you want them.

When we tasted  pieces now and then, they just tasted better and better.  What a wonderful explosion of flavor.  :)

 TIP....  Do NOT make this when you are hungry!!!  Eat something first as these smell and taste so good that it may be hard to stop "trying" them.   🙂


 I put my Chicken Bits into 2 feta cheese containers and put them in the freezer. I didn't make a lot of it...  so we will be careful on how much we use at at time... just like we would be careful about how many bacon bits we would use.

I also told the family that these containers are not to be used for casseroles or soups... these are for chicken bit uses only! They would taste great in anything, but I want to make these last.  I have some ideas of what I want to do with them... and plan to share one of them soon.


Here we had chicken bits in our broccoli salad... and they were delicious!  We usually use bacon bits, but loved the chicken bits and they added such great flavor.

We have also used chicken bits in a regular salad and on BLT sandwiches. I love having these highly flavored bits of chicken ready to add something special to dishes.


 ~~~~~~~~~~~~~~~~~~~~~~~~~~~~~~~~~~~~~~~~~~~~~~~~~~~~~~~~~~~~~~~~~~~~~~~~~

           How to make delicious bits of chicken to use in place of bacon bits.


                          Chicken Bits


 1-2  Chicken breasts, already cooked
 1/2 cup Olive Oil
 1 1/2 - 2 tsp dried Italian seasoning (can add other seasonings also, if desired)
 1/2 tsp. dried garlic
 1 tsp. dried onions ..................................... Put in frying pan, cook on medium heat. Cut meat
                                                                           into small pieces as it cooks

1/4 cup BBQ sauce
1 cup Italian dressing.................................. Stir in and continue to turn over as the meat browns


................................................................ Cook on medium heat for about 25 minutes until it reaches
                                                                    the brown and toasty color you like. This needs to be
                                                                    watched as you don't want it to burn.

                                                                 More olive oil can be added, if desired.                                                                   


                                                                  Store in a covered container in the freezer and use as
                                                                      needed. Great for salads, pizza, BLTs, and more.


Gentle Joy Homemaker                               www.http://gentlejoyhomemaker.blogspot.com

~~~~~~~~~~~~~~~~~~~~~~~~~~~~~~~~~~~~~~~~~~~~~~~~~~~~~~~~~~~~~~~~~~~~~~~~~~
               
 Thank you for visiting... If you make these, I would love to hear about it... and how you use them.... or if you have made something similar.  I love to read your comments.  I hope you have a wonderful week.


Shared on:


Scraptastic Saturday
Simple Saturday
Home Matters Linky Party
Inspiration Spotlight
Paula's No Rules Weekend Party
Thursday Favorite Things
Share Your Cup
Penny Pinching Party
Aprons and Pearls Link Up
Wise Woman
Tuesdays w/a Twist
Inspire Me Tuesday
Amaze Me Monday
Cooking and Crafting w/ j and j
Art of Homemaking Monday
Modest Mom Monday
Over the Moon Link Party


Sunday, August 6, 2017

5 More Fruit and Herb Waters


 We are sure enjoying the Fruit and Herb Waters we have been making lately. The last post was:


4 Great Fruit and Herb Waters (this is a link)


 After trying these 4 fruit and herb waters... and enjoying them... I kept experimenting and came up with 5 more. Here are the five.............


 Peach, Ginger and Basil Water....  We really enjoyed this one and they loved eating the peaches out of the drink after it was done also. 


 Grapefruit, Tumeric and Dill Water............ This one was loved by several in the family. Though I loved the smell of this water, it was a bit strong for one of our daughters and for me, but it was good. My husband LOVED this one. I was glad he did since the tumeric in it (those pieces that look like carrot slices) are great for inflammation and he is needing that for his knee.

I did like the dill.... I love dill and eat it raw.... and love the young seeds raw also, so I plan to try dill in another water mix to find one that I like better.  🙂


 Kiwi, Ginger and Basil.... this one tasted good, but we found it is better not to let this one sit as long. It tastes better when used soon.


 Lemon and Lavender.....  I am not fond of the taste lavender, so was a bit skeptical on this one, but I have fresh lavender and wanted to try it... and it sounded good with lemon. This was really good... such a fresh taste and the lavender was light, not heavy. We all really liked this one. If you love the taste of lavender already, you could add a lot more of it. 


 Cherry and Thyme.... this was a last minute idea.... I had found cherries on sale and they are a pretty color and loved by the family, so I decided to try it. I haven't used thyme yet for the waters, so I put thyme with it. It was good, but next time I would put more cherries in it. My husband loved this one too.

I think he liked most of the waters and loved a lot of them. I am so glad I can make these for him... he has a bit of an aversion to drinking a lot of plain water and he is trying to stay away from sugary drinks.


I really do like the fruit and herb waters. I like that we can have water with flavor sometimes... (this is REALLY big to my husband!)... and that we can get extra nutrition. There is such a variety of possibilities too.  Have you been enjoying such waters? Are you making your own? Have you come up with a combination you really like? I would love to hear from you in the comments. I hope you have a great week.


Shared on:


Modest Mom Monday
Scraptastic Saturday
Simple Saturday
Blogger's Pit Stop
Friday at the Fire Station
Weekend Potluck
Inspiration Spotlight
Paula's No Rules Weekend Party
Home and Garden Thursday
Homestead Blog Hop
Tuesday Talk
Tuesdays w/ a Twist
Tasty Tuesday
Totally Terrific Tuesday
Tuesdays At Our Home
Cooking and Crafting w/ j and j
Art of Homemaking Monday

Sunday, July 30, 2017

4 Great Fruit and Herb Waters


 We are trying hard to increase our fluid intake... and are drinking a lot of plain water. Sometimes, though, it is nice to have something with a little flavor... a little different, so I have been making these Fruit and Herb Waters.

I don't know why I stopped making such drinks... it doesn't take long... and it doesn't take a lot of ingredients... and I have fresh herbs right outside in my garden!


 This one is Lemon, Basil, Sage and Mint Water and it is so refreshing, with a light flavor, but not like a lemonade. It is just a fresh water taste. I used 1 lemon sliced and a few herbs...  to make a gallon of drink... and then I also refilled it with water, so we actually made 2 gallons of drink with this small amount of ingredients. Delicious!


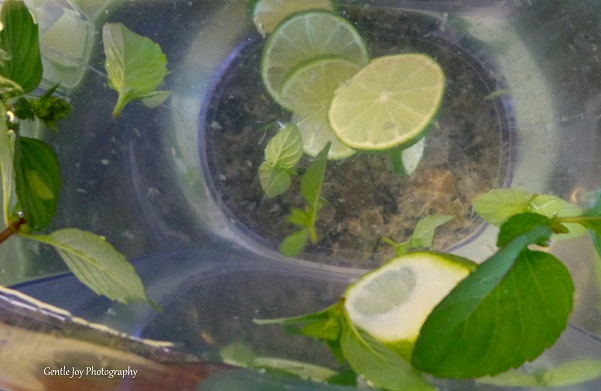
 This next one is Lime, Basil, Lemon Balm and Mint.

There is only one small lime sliced, and some herbs... not a lot.

It gave some flavor and this drink was refreshing also... the herbs add a little taste.. not a lot as I don't want to overpower the taste. I love that we are getting some nutrition in with our fluids, but no sugar or fake additives.


 This drink is Orange-Basil Water. Yes, I have a lot of basil.  :)  This basil isn't as strong as some of them, so if you have the strong basil, you may want to put just a little in to see how much you like.


 I thought I would show this Orange-Basil Water with what we had for supper that night... they went quite well together.

We had meatloaf burgers... and they were WONDERFUL! If you are interested, you can find the recipe here:

 Hearty Meatloaf Burgers


 This is Cucumber Strawberry Water.  I used one small cucumber and 2-3 strawberries.

We have enjoyed all of the Fruit and Herb Waters and I have more to try and will plan to share those in a future post.

I am pleased that my family is enjoying these drinks and we are getting a bit of nutrition from them. I think it is helping us to drink a bit more fluid also.

Yes, I still encourage each one to drink a LOT of plain water also, but 2 or 3 glasses of the fruit waters a day has been a nice addition to our water intake... and we can also eat the fruit that is in the drink. This has been especially helpful with the hot temperatures we have had lately.

By the way, one daughter said that her favorite of these 4 drinks was the first one... the Lemon, Sage, Basil and Mint. Just a reminder...  you don't need a lot of the herbs to add a little flavor... and bruising the leaves can help more flavor to be released into the water, although I didn't do that for most of mine.

I love how fresh and colorful the pitcher of Fruit and Herb Water is...  I hope you enjoy some of these also... or experiment and find some other combinations you enjoy. I have a few more to try. Thank you for visiting. I hope you have a great week.  :)


Shared on:
Scraptastic Saturdays
Friday at the Fire Station
Weekend Potluck
Home and Garden Thursday
Thursday Favorite Things
Penny Pinching Party
Homestead Blog Hop
Talk of the Town
Brag About It
Tuesday Talk
Tasty Tuesday
Inspire Me Tuesday
Tuesdays w/ a Twist
Tuesdays at Our Home
Amaze Me Monday
You're The Star
Cooking and Crafting w/ j and j
Art of Homemaking Monday
Modest Mom Monday
Over the Moon Link Party

Monday, July 17, 2017

HERB LIBRARY- 5 Reasons To Start Your Own


 Herbs are helpful... and they are plentiful in most parts of the world.

In a time when the internet is in great use, WHY do we need to have a "book library" of herb books?

Am I saying that everyone should have one? No, you will have to decide if you want one for your home or not, but in this post, I am giving 5 reasons why it is a good idea to start your own Herb Library.


1.  Identification....

      Herbs can be of great use in our health, but it is important to correctly identify the herb you use. Sometimes there can be plants that look very similar to an herb we want to use, but the other plant can be quite dangerous. Small details can show the difference.

      I like to have a book, or actually several books, that give good illustrations of the herb. A drawing or painting of an herb can be helpful, but I also want actual pictures so that I can compare what they really look like as they grow. I also like to see pictures of the plant, as a whole... and a close up, so that there is no doubt I know what to look for.


 I have quite a large library of herb books... is that necessary for everyone?   Of course not!

I use herbs and enjoy them....  I grow them in my garden and I collect them from the garden and from other places.

I keep learning and becoming a better herbalist as I read and use herbs. I do want to be very careful to have correct information, so I like having a variety of books to compare.


2. Learn New Herbs....

There are some herbs that are quite well known and others that can be useful to get to know. Learning a little at a time can help solidify that knowledge.  In this post, I am showing pictures of the herb Echinacea.  It is a well-known herb and in many places, it grows well. I have much of it in my garden and it is great for pictures.

What other herbs are there? What about plantain? Plantain is wonderful to identify and know how to use. It can work well for bee stings and is readily available to apply to the sting, but where do you find it? How do you use it?

There are so many herbs all around and when you start to look at pictures in the herb books, you may realize that you have seen many of them without realizing they were herbs.

We all know of the dandelion, but there are also so many others. You may have seen chicory on the side of the road in the summer and wondered what those purple flowers were.  Some other simple plants are purslane, lambs ear, yarrow, chamomile, and there are so many others. Learning to see these "weeds" as herbs can expand your knowledge... and your ability to use them.


 Do I use ALL of my books often? No, I don't.

Sometimes, I scan them and other times I compare. Sometimes, they sit on the shelf for long periods of time without being used at all.

Sometimes I find that a certain book just doesn't fit what I need, so I remove it from my library. I have been building my Herb Library for many years and it is helpful to me.


3. Know HOW to use an herb

 Some herbs are quite easy to use... like plantain's helpfulness when it is applied to a wound. Other herbs must be used differently. Sometimes there are cautions.... for instance some herbs are not safe for use during pregnancy.  Others may be helpful in small doses.  It is important to know facts about herbs.

If you have read my blog for very long, you know that I like to experiment... and I do it with herbs also.  I make herbal tinctures, salves, teas, infusions and more. I put herbs in our salads and I try new things, BUT I do not want to make foolish mistakes and endanger my family, so it is important to be wise in how I experiment and my library can help me know what herbs are safer to do that with than others.

An important point is to double check your information! Some books or internet information may blacklist a certain herb as toxic and caution to never use it.... when the reality is that a certain part of the plant can be toxic while others are fine to use.

Caution is good, but to just knock out a whole plant for a small portion seems excessive. I want to know the bad... and the good and then make a wise decision.  For example, cherry twigs are toxic, so do we stop eating cherries because of that? No. Tomatoes are from the dangerous nightshade family, so do we stop eating tomatoes? That was done in the past, but we can still enjoy tomatoes. It is important to know and be careful.


Do I need to spend a lot of money for this Herb Library?  NO!

I am quite frugal and it is rare that I would buy a book like this new and for a large price. I have found it helpful to use a book from the library... to see if it would be helpful to me. Then sometimes, I would order it for my own library.

Some places to check for herb books are garage sales, library book sales, ebay, Amazon, etc.


4.  A personal Herb Library can be a place to highlight information.... to mark pages so you can easily find them... to jot notes that will be helpful to you. 

So many times, I have learned great information.... and later when trying to go back to the source, I sometimes wonder, "Where did I read that?" Maybe it was the internet.. or a book... or I heard it from someone. It is more helpful to have a library to collect that learning... so that I can refer back to it. Sometimes I want to double check the information... or sometimes I found the information so helpful that I want to see what else the person says.

I also find it helpful to build on what I learn and having my own books can help that process.


Do I recommend all of these books? NO... some I don't know enough about them to recommend. Others I like some parts, but not others.

There may be some herb books I would love to add to my library, but cost prevents me from doing that.

My library is still a work in progress and I will keep adding to it.


5. If there's no internet....

I know this is the answer for many... just check the internet... just ask the internet.
What if the internet is out? What if you are where there is no internet? Think it can't happen? It does.... especially when there are storms or large problems, like hurricanes, earthquakes, tornado damage, flooding or other disaster situations.  In a time like that, those herb books could be very important as there may not be access to the nearby emergency room or doctor's office.

Another issue is trust. Is everything on the internet true? No, and books are not always true either, which is another reason to double and triple check your information. When I find a book I feel I can trust, I am still careful with the information, but tend to trust it easier than an unknown website.


Maybe you don't like or use herbs and so none of this post applies to you. That's okay, I am not pushing herbal use.... it's an individual choice.  I know what a blessing my herbal library is to me, so I am sharing why it may be helpful to others also.

Do you have an Herb Library? Even one book can count as the start of a library.... and one book may be all you want or need. I would love to hear in the comments if you have a real book library of herb books... or one book. Are you still adding to it? Do you have other reasons it is helpful to have an Herb Library? Please feel free to share in the comments.

Thank you for visiting. I hope you have a great week!  🙂


Other herb posts you may enjoy:

Quick Healing With Plantain

Are There Any Uses For Columbine?

Allergy Tea-Homemade Herb Tea

Pinecones... Are They Edible? Hmmm...


Shared on:


You're the Star
Over the Moon Link Party
Scraptastic Saturday
Simple Saturday
Flaunt It Friday 365
Create Bake Grow Gather
Friday Photo Journal
Blogger's Pit Stop
Friday at the Fire Station
Vintage Charm
Paula's No Rules Weekend Party
Thursday Favorite Things
Home and Garden Thursday
Tip Tuesday
Homemaking Party
Wednesday AIM Link Party
Writer Wednesday
Wise Woman Link Up
Penny Pinching Party
Homestead Blog Hop
Wow Us Wednesday
Tuesdays at our Home
Tuesdays w/ a Twist
Inspire Me Tuesday
Modest Mom Monday
Cooking and Crafting w/ j and j
Art of Homemaking Monday

Friday, February 17, 2017

10 Tips For Shopping at Amish or Mennonite Stores


I love shopping at Amish or Mennonite stores. What a blessing such stores are to my big family. As I have shopped in these for a few years, I have learned a few things that I'd like to share with you....


1. Take a list

    I have gone shopping and been sure I would remember what I needed. That doesn't always work well in a regular grocery store and it REALLY doesn't work well in an Amish or Mennonite store, unless you are only seeking a very few items. These stores are marvelous... and can also be overwhelming in all of the choices offered. A list helps to remember the needed items without stressing, which allows you to enjoy looking at some new items also.

2. Be prepared to store large quantities

    One wonderful thing is buying in bulk, but that also means you will need to deal with large bags. I buy 50 pounds of flour or oatmeal, which is great, but I do not put a 50 pound bag on the shelf in my pantry as that would not be convenient, nor do I have the room for it. You will need to develop a system of storing the larger bag safely and protect it from  moisture, bugs or damage while you also use it to fill a smaller container for the cupboard. For the oats, I fill buckets, with tight lids, and label them... for oatmeal, flour, sugar or whatever. The buckets can be stacked in the basement, garage or other places. You can find them free or for a low price from bakeries and the food is protected. Smaller more convenient containers will work well in the cupboard or pantry and can be refilled as needed.

    Other foods.... herbs, salt, baking powder and more come in plastic containers or bags. If you have the room, some of the containers are a great size to use in the cupboard, but sometimes they can also be cumbersome.... especially if you have a large variety, like I do. I have a system, that I am currently trying to revise to be even more workable.

3. Take cash

     Take cash unless you know for sure that they accept credit, debit cards or checks. Some stores have updated to these and others have not. Having cash will ensure you can actually buy things when you are in that wonderful store... While there you can see what their policies are for future reference.


4.  Be flexible

     Many of the same products will be in stock every time you go, but some are seasonal... like fresh produce, garden seeds, certain herbs and more. It is nice to see items that I didn't realize I would even find there and I have found many treasures that we use often.

5.  Be prepared to guess

      Realize that the bulk items will not have much information on the labels. There are not usually directions on how to use the item. Sometimes you can ask at the store... or experiment. I have found some great items, but didn't know the "right" way to use them, so had to figure it out. Sometimes that was good... sometimes not. Don't be afraid to learn... but also don't get too many new things at once so that it becomes overwhelming.


6.  Think about trying a new item

      I have enlarged my supply to include so many great items... many times because of the excitement of the great variety I have found in the Amish/Mennonite store. Some things have become permanent fixtures in my panty, others are occasional, while others are not replaced after I use them up the first time.

       I have been able to find many new herbs at the Amish store and have loved learning to use them and I maintain a large supply of herbs for various uses. It is nice to replenish some of my herb stock from the Amish store. There are also various sizes of salt or sugar crystals that are nice to use in baking rather than the one size I have used for years. There are all kinds of great things, but they won't be great for you and your family if you don't use them.

     By the way, I have bought some things in my zeal and used the reasoning that it must be healthy and a good thing if the Amish or Mennonites use it. That isn't always true and it isn't the best reasoning either. Trial and error can be a good teacher.

7.   Plan to do research on some things

     If you buy an herb in a container with only the name on it and aren't sure what it is used for, you must not assume it would make a great tea to drink... some will and some are only meant for external use. There are many great herbs at a good price and I have expanded my knowledge by buying a new herb or two at a time and researching to figure out how to use it. The lack of information is quite foreign to those of us "Englishers" who typically shop in regular stores. This can be quite daunting at first, but just plan to do your own research and it will work great.


8.  Buy a bit extra

     Most Amish/Mennonite stores are in out-of-the-way places or deep in the country. They are not stores that tend to be easy to run to pick up one or two items, so usually we don't go to these stores as often. It is hard to have a staple that we only get at the Amish store and to have to be without it for months after we run out. Our Amish store is 100 miles away and our Mennnonite store is over 150 miles away, so we don't go often at all. We usually go when traveling to see family as we are closer to the stores then. Sometimes I have made a special trip to the Amish store to resupply when we needed a lot, but that is rare and it is combined with a home school field trip.

9.  Not all Amish/Mennonite stores are the same

     Prices and supplies vary from store to store. I find that our Amish store has a much better supply of herbs than the Mennonite store. They also have better prices on the bulk herbs, spices and 50 pound sacks of flour and oatmeal. They also carry a no-msg chicken soup stock powder and the Mennonite store does not.  However, the Mennonite store has markdown items-damaged freight type stuff.... and I get wonderful prices on vitamins, canned goods, jams and jellies, granola bars, yogurt, regular spices and much more. Each store has a special place in my heart for different reasons. Sometimes, I will buy the more expensive bulk items at the Mennonite store because I tend to get to it more often and the prices are not terribly high and it is worth it to me if I can't get to the Amish store.


10.  Some items will be cheaper in a "regular" grocery store

     I was surprised to see some "Aldi" groceries at these stores. Since I shop at Aldi, I know many of their prices and saw that they are marked up higher in the Amish/Mennonite stores. I think the reason is that the Amish and Mennonite stores sell to us (Englishers), but mostly to Amish and Mennonite who are helped in having the convenience of these foods for just a bit of mark up. For us, it is cheaper to just buy them on the next trip to the regular grocery store.... The items I have seen like this include: saltines, chocolate chips, salad dressing and more.  The price is not a huge difference, but enough for me to avoid buying what I can buy cheaper elsewhere.

11.  Extra Tips

     These stores may not have electricity so on cloudy days it can be hard to see... especially to see the prices of items on the bottom shelves. I asked a proprietor at a sweet little Amish store if he would be offended if I brought a flashlight and he laughed and said he wouldn't.  :)

        ~Take snacks or lunch/don't plan on fast food nearby...
        ~Plan to dress modestly to show respect. Jeans or capris are fine, but it is best not to wear revealing clothes.
       ~Also restrict photographs and don't take pictures of the people.
       ~Take note of the days and hours of operation for future reference, since some stores do not have phones or websites.
      ~Take a cooler w/ ice for transporting cold things back to your house.
      ~There may not be any cell phone reception
      ~ I like the brooms at our Amish store and have paid about $5 each....
      ~There may be other non-food supplies that could be helpful
      ~Sometimes the first container of herbs will be washed out and drained of color because of too much exposure to the light. If it is extreme, I choose one from further back which has more color and nutrition.


   If you have the chance to visit an Amish or Mennonite store, I hope you will take the opportunity to enjoy shopping.  If you have other tips on shopping at an Amish or Mennonite store, I would love to see them and so would other readers... just share them in the comments.

Thank you for visiting my blog and please return soon. I hope you have a wonderful day.  :)


"The Lord hath done great things for us; whereof we are glad."  Psalm 126:3

Another post about Amish Store shopping you may enjoy:
    Trip To The Amish Store


     #Amish #Mennonite #shopbulk #shopping #tips


  Shared on:


The Last Art of Homemaking
Thrifty Thursday Link Party

Penny Pinching Party
Talk of the Town Link Party
Wednesday AIM Link Party
image-in-ing
Simple Saturdays
Dishing It and Digging It
Homestead Blog Hop
Blogger's Pit Stop
Homemaking Party
Inspire Me Monday
Over the Moon Link Party
Friday Feature Party
Traffic Jam Weekend Party
Wise Woman Link Up
Friday At the Fire Station
Weekend Potluck
Foodie Friday and Everything Else
Home and Garden Thursday
Counting Our Blessings
Modest Mom Monday
Art of Homemaking Mondays

Featured on:
Thrifty Thursday

Sunday, May 10, 2015

Small Garden-Part 7-Plant Labels


For several years, I have wanted to add name tags to my herbs in the garden. I wanted them so my family can learn what the herbs are and also because sometimes I get specialized herbs... and I forget what they are. :)

I have had different ideas.. and have seen things on Pinterest, but nothing looked like something I wanted to do either because of time and effort required... or the expense.


Recently, I decided to tackle this project, using an old mini blind shade. This is one we are not going to use again... and rather than throw it away, I decided to use it.

You can see at the bottom that I have cut the strings... the bottom section was cleaner. I took out 3 of the slats.


Here are the 3 slats... and I have started cutting them up. I wasn't sure how I wanted to do this, so some experimenting happened.
 I have a set of jewelry tools... I know this isn't really what they are for, but it is what I had, so I got those out.

I have been surprised how handy this set of jewelry tools has been for me... I bought them on sale for about $10.00 new... and I have been so glad to have them. :)

I also decided to use some heavier wire... this is #18 gauge galvanized utility wire.  I had bought a pound of it at a garage sale and it seemed perfect for this task.


 The one on the right is my first attempt at making this... and I think the rest are definitely improvements. :)

On the first one I did, I used the backside of the slat so that it was scooped...  that is the comfrey tag.

On the echinacea tag, I turned it so that the rounded part is what I write on... and I like it a lot better this way.


Step 1: Using scissors, cut slat piece to about 3".

Step 2: Cut the corners off

Step 3: Use hole punch to punch 2 holes at each end, as shown.

Step 4: Using a black permanent marker (A Sharpie works great), draw a simple border.

Step 5: Write the name of the plant


 Step 6: Using wire cutters, cut 18 gauge wire to about 15" length.

Step 7: Bend wire at 6" (90 degree angle)

Step 8: Make another 90 degree bend in the wire.... measure by looking at one of your slat/tags.

Step 9: Starting with long end, feed it into the tag... from the BACK of the tag. Do the same with the short end, when you get to that point.


 Step 10:  Lay tag with the backside up.... bend both wires ... once at corner, then again in middle to go down.

Step 11: Twist wire. This can be done with your fingers or pliers.


Step 12: The tag/sign will be flat... it can be used this way... or it can be adjusted (this is what I do), so that it faces upward a bit.

I like it this way so that a person who is standing in the garden can read it without having to bend down.

That's it... since the wire is quite stiff... it pushes into the garden quite well... it will bend, so push carefully.


As the patch of herbs grows, it will be easy to move the tag, if necessary. 

I have 2 kinds of thyme, so I am glad to label them both. 


I actually have 3 or 4 stands of yarrow around the yard... I'm not sure if I will label all of them or not. We'll see.

I also have basil in 2 places... this is the newest area... just transplanted a couple of days ago from another larger planting in the garden.

I hope to get some different lavenders also... I am thinking I will probably name the kind of lavender on the tag.. and maybe even the hardiness rating, so I know if I need to overwinter it in the house or not. 


 I hope to have a lot of borage this year. :)

The comfrey is new this year from a friend... I use a lot of comfrey, so I am excited to have it in my garden. :)

I don't know how long these will last... maybe only one season, maybe 2 or more, but I am so thankful to have the labels started.

Eventually, I would like to make these tags for rows of carrots, beets, radishes, peas and other veggies. It would be helpful to mark the rows until the plants come up. I would plan to take them in and re-use them the next year.


I love going to professional gardens that have their plants labeled.. that has helped me to identify some of my plants. What a treat to have my own labels now.

Thank you for visiting... I hope you found this information helpful.


     The Small Garden Series:
Small Garden-Part 1-Crop Rotation 

Small Garden-Part 2-Growing UP

Small Garden-Part 3-More Beds

Small Garden-Part 4-Companion Planting

Small Garden-Part 5-Signs

Small Garden-Part 6-Paths

Small Garden-Part 7-Plant Labels


Shared on:

Two Uses Tuesday
Funtastic Friday
From the Farm
Foodie Friday and Everything Else
Charm of Home
Green Thumb Thursday
Paula's No Rules Weekend Party
Homeacre Blog Hop
Share Your Cup Thursday
Create It Thursday
Thriving On Thursday
Wise Woman
Homestead Blog Hop
So Much At Home
Hump Day Happenings
Wordless Wednesday
Wake Up Wednesday
Talented Tuesday
Tell It To Me Tuesday
Maple Hill Hop
Tuesday Garden Party
Roses of Inspiration
Tuesday Talk
Good Morning Monday
What'd You Do This Weekend?
The Art of Homemaking